Client Highlights
May 29, 2013 - Posted in Event Planner, migrate
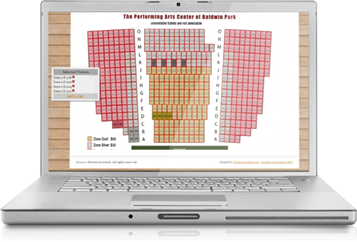
Best Practices for Building Your Interactive Seating Charts
There are many cool websites that allow you to raise funds for your organization or projects. You can raise these funds as either an individual or non-profit. For sites that focus only on fundraising you will pay anywhere between 3-9% in fees on the money you raise. The average fee is about 5% plus a merchant processor fee.
When you combine Fundraising and Events, fees increase significantly. If you want to fund raise and host an event via online methods, oftentimes you will have to sign up for 2 different services.
In response to the demand of online ticketing and donation services, many fundraising sites and event sites have teamed up together to offer both donation and event services. It may seem like an easy and convenient option. However, you are often left with using two different tools and sites that are not fully integrated. In the end you may still end up with two different sites and services to manage.
First Giving has teamed up with Eventbrite, Donate Now works with Givezooks. For services that allow both, you are limited to one type of ticketing mode and one type of donation mode. With SimpleTix service you have 9 different styles of ticketing, the ability to host your entire site on SimpleTix or have us match your site. Site matching enables you to keep all of your branding. You are not left having to settle for one generic events and donation page.
With SimpleTix you can create a fundraising page. Supporters and event attendees can shop for your event, add a donation, and pay as part of one transaction. For your enthusiastic supports, they can use social sign in to promote your event and fundraising efforts on Facebook, Twitter, Linked In and others.
By using SimpleTix for your events and donations, you will see increased saving, knowing that everything is being handled on one site.
Want to know how to create a Donations page? Create Donations page
Happy Event Planning & Fundraising!
The cost of fundraising sites with events vs. the cost of SimpleTix – We have created this infographic to demonstrate your level of savings with SimpleTix. Inquiries can be sent to Carmen@simpletix.com

Additional Information:
Cost Per One Event Calculated: 400 tickets sold at $35 each, 120 attendees gave an average donation of $50, $14,000 earned on ticket sales and $6,000 from online donations, for a total of $20,000 raised per one event.
Cost Per Year Calculated:For one year, 6,000 tickets sold at an average price of $35 each, earning $210,000 in ticket sales and 2 major fundraising galas where 800 tickets were sold for $150 each, for a total earnings from ticket sales of $330,000. $157,000 was raised throughout the year via online donations. For a total of $487,000 raised.
For variable rates like payment gateways, an average 2.5% was used. All comparisons are based on lowest cost plans available. No additional options were chosen so competitor pricing options maybe higher.
All of this for just $0.79 + 2% per attendee
Zero up-front cost, with a low rate fee of $0.79 + 2% per ticket. Seamless integration with Square, Stripe, PayPal, Authorize.net, and more. And instant payment means no waiting for payouts by check.
Yes, ticketing can be this simple… With SimpleTix.


